
To access Octane's customization options, click on the Settings button located on the bottom right corner of the dashboard. From there, you can select the theme of your choice, add a custom background image, and configure other settings. Experiment with different options until you find the perfect combination that suits your preferences and needs.
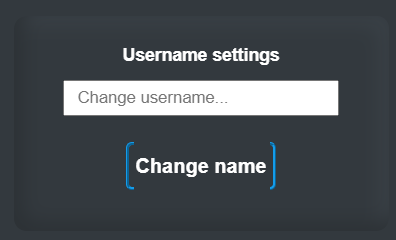
To change the name displayed on the Octane dashboard, click on the Settings button located on the bottom right corner of the dashboard. Then, click on the "Change username" field and type in the new name you want to display. Finally, click on "Change name" to apply the changes. Your new name will now be displayed on the dashboard. This will change it from "Stranger" to the name provided.
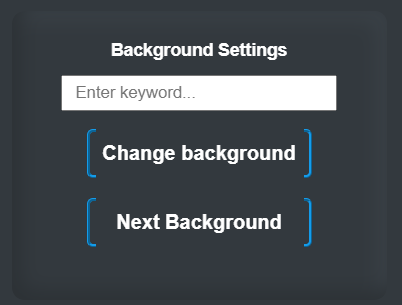
To change the background image on the Octane dashboard, click on the
Settings button located at the bottom right corner of the dashboard.
You'll see the "Background Settings" option. You can enter a keyword
related to the type of image you want to use as your background, and
Octane will search for images related to your keyword using an API.
If the API cannot find an exact match for your keyword, Octane will
use a similar image instead. Once you have typed your desired image
keyword, click on "Change Background" to apply the new background to
your
dashboard. Also clicking on the "Next Background" button will
provide the next
image of your search.
Note: Octane changes the background by default every 30 minutes if a
tab
is left open
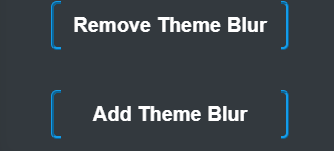
Octane provides a cool feature that lets you add a blur effect to your themes. This effect adds a touch of style and artistry to your backgrounds. However, not all backgrounds work well with the blur effect, so you have the choice to use it or not. You're in control! Octane allows you to decide whether to apply the blur effect to a background or keep it clear and sharp. This way, you can customize your themes to match your personal preferences and make sure each background looks its best. With Octane, you can strike the perfect balance by selectively using the blur effect where it enhances the overall look and feel of your themes. This ensures that your themes are visually appealing and unique to your taste.
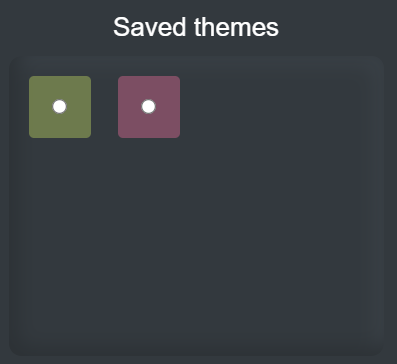
When you create a theme and save it, the theme is stored in a section called "Saved Themes" for easy access later on. This means you can find and use your saved themes whenever you want without having to recreate them from scratch.
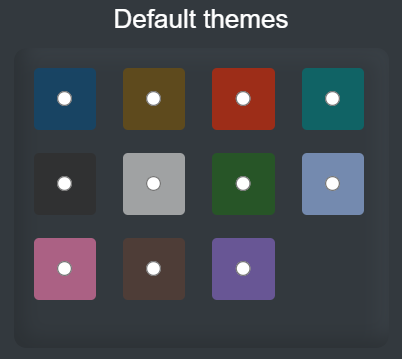
Another way to change the theme on the Octane dashboard is to use the default themes provided. Click on the Settings button located on the bottom right corner of the dashboard. From the "Default themes" section, simply click on the color you want to apply to the dashboard. The new theme will be applied immediately.
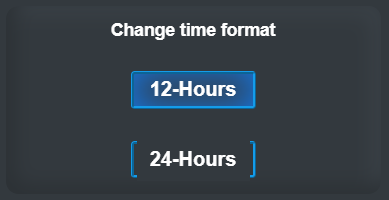
To change the time format on the Octane dashboard, click on the Settings button located on the bottom right corner of the dashboard. Find the "Change time format" section, from there, you can choose between the 24-hour time format or the 12-hour time format. Once you have selected your desired time format, the dashboard will now display the time in your chosen format.
Lorem ipsum dolor sit amet consectetur adipisicing elit. Libero repellendus sapiente ratione perspiciatis molestias dolore fuga unde impedit nostrum debitis cum praesentium maiores doloremque perferendis temporibus quia, accusamus ea sequi?
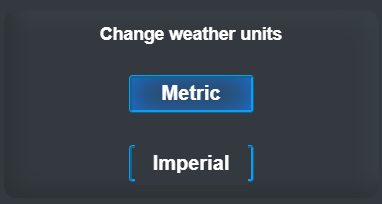
To change the measurement unit for weather information on the Octane dashboard, click on the Settings button located on the bottom right corner of the dashboard. Find the "Change weather units" section, from there, you can choose between imperial or metric units. Once you have selected your desired measurement unit, the weather information displayed on the dashboard will now be adjusted according to your chosen measurement unit.
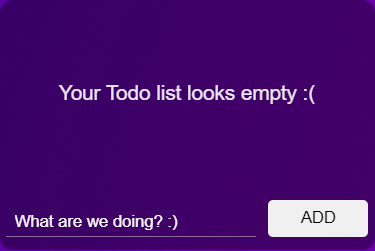
To add an item to the to-do list on the Octane dashboard, simply click on the input field located at the top left of the dashboard. Type in the task you want to add and click on the "Add" button located on the right side of the input field. The task will be added to the to-do list section of the dashboard. To indicate a task as completed, click on the checkbox located on the left side of the task, the task will be removed from the to-do list. This feature is a great way to keep track of your tasks and stay organized while browsing the web.

To access the notes feature on the Octane dashboard, click on the "Octane Notes" button located on the left side of the dashboard. This will open up a section where you can type short notes or key points.
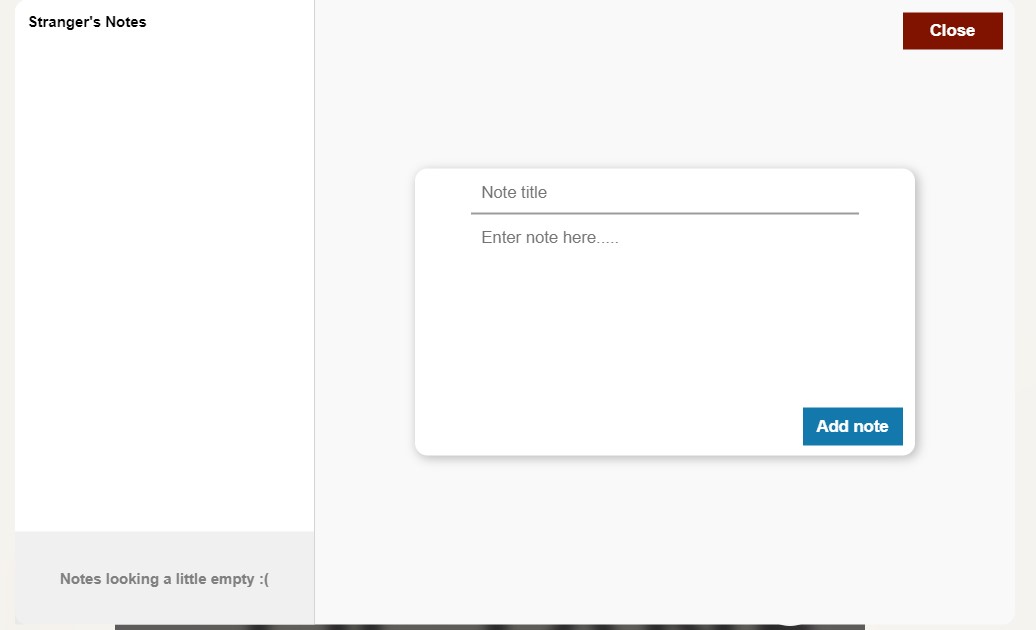
Once octane notes has been opened, simply click on the input field and start typing your note. Once you have finished typing your note, click on the "Add note" button to add it to the list of notes. You can add as many notes as you like. To delete a note, click on the "delete" button that appears on the right side of the note. The note will be removed from the list. The notes feature is a great way to jot down important information or reminders while browsing the web, and keep them in one convenient location.
To use the bookmarks feature in Octane, click on the "Bookmarks" button located on the left side of the dashboard. This will open up a section where you can view your bookmarks.
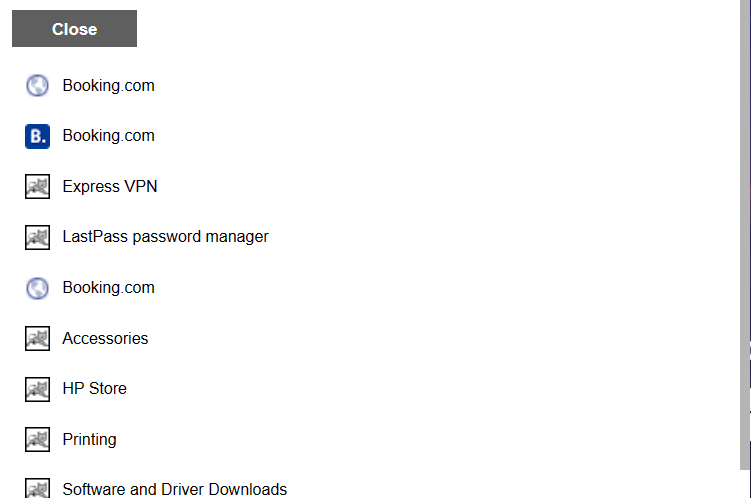
Octane's bookmarks feature shows a list of bookmarks that have been saved in your browser. To add a new bookmark, simply add it as you normally would in your browser, and it will automatically appear in the Octane bookmarks list. Once the "Bookmarks" button has been clicked, you can view all of your saved bookmarks, and access them quickly and easily by clicking on them. Overall, the bookmarks feature in Octane is a convenient way to keep track of your favorite websites and access them quickly from the dashboard, without having to navigate through multiple tabs and bookmarks folders.
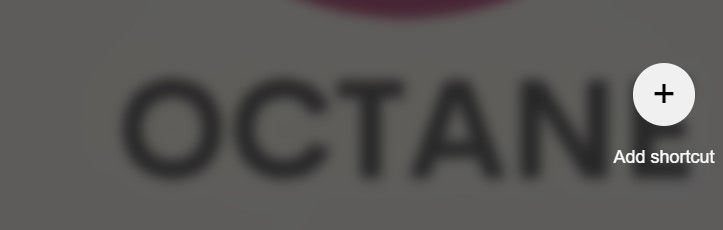
Octane's "Add shortcut" button allows users to add their favorite websites as shortcuts on the dashboard, making it easier to access them quickly.
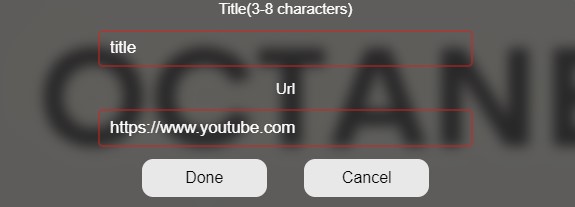
To add a new shortcut using Octane's "Add shortcut" button, there are a few specific requirements that need to be followed. Firstly, the URL must be valid and begin with "https://" in order for the page to load correctly. If the URL is not valid, the page may not load or the shortcut may not be saved. Additionally, the name for the shortcut must be between 3-8 characters long. This ensures that the name fits appropriately on the dashboard without taking up too much space.
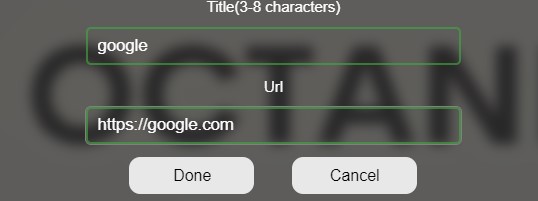
To add a new shortcut, click on the "Add shortcut" on the dashboard. Then, enter the name of the website and the valid URL in the fields provided. The name should be between 3-8 characters long, and the URL must begin with "https://" when all this is valid, you should see a green border around the input fields. Finally, click on "Done" to save the shortcut. The website will now appear as a clickable box on the dashboard, which can be accessed quickly and easily by clicking on it. By following these requirements, users can ensure that their shortcuts are properly saved and functional on the Octane dashboard.
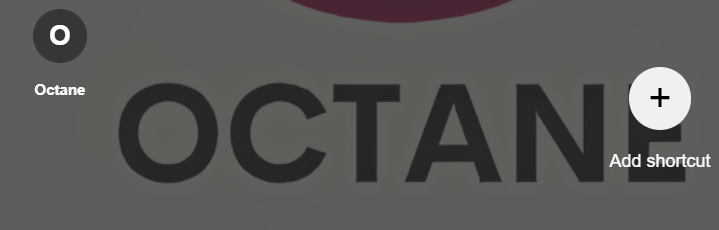
When a user adds a shortcut using the "Add Shortcut" button in Octane, it appears as a clickable box on the dashboard. The name of the shortcut is displayed in the box. When the user clicks on it, it will redirect them to the saved website. In addition to this, there is also a "remove" button on the top of the box. Clicking on this button will delete the shortcut, removing it from the dashboard. This allows users to easily manage their saved shortcuts and keep their dashboard organized.